Are you tired of struggling to capture natural and realistic photos with even lighting, detailed textures, and seamless backgrounds? Look no further than stable diffusion prompts. These techniques can help you achieve stunning results in your photography, whether you’re a beginner or a seasoned pro.
From tips on creating the perfect lighting setup to answers to common questions about diffusion techniques, we’ve got you covered. Join us as we explore the world of stable diffusion and discover how it can take your photography to the next level.

Improving AI imaging techniques with prompts
Just as a skilled photographer meticulously adjusts camera settings and composes their shots to achieve a compelling image, leveraging diverse approaches in AI can significantly enhance the realism of generated images. Improving AI imaging techniques through the use of prompts involves several strategies that can enhance the quality and relevance of generated images based on user input. Here are some methods to consider:
➡️ Clarity in Prompts
- Be Specific: Use detailed descriptions to guide the AI. Instead of saying “a dog,” you might say “a fluffy golden retriever puppy sitting on a sunny beach.”
- Contextual Information: Provide context to the prompt, such as mood (e.g., “a serene landscape during sunset”) or style (e.g., “in the style of Van Gogh”).
➡️Use of Parameters
- Incorporate Parameters: Many AI imaging models allow modifiers (like style, color palette, or time period). Including these can help in achieving the desired outcome more effectively.
- Specify Angles and Perspectives: Mentioning viewpoints such as “aerial view,” “close-up,” or “portrait” can drastically change the generated images.
➡️ Iterative Refinement
- Refine Prompts: After generating an image, analyze the result and adjust your prompt based on what worked or didn’t. This can include changing adjectives, adding elements, or focusing on different aspects.
- Feedback Loop: If the system allows, provide feedback on generated images to refine future models and outputs.
➡️ Leveraging Styles and References
- Artistic References: Mention specific artists, art movements, or styles to guide the tonal and aesthetic quality. For instance, “a landscape painting inspired by impressionism.”
- Cultural Contexts: Incorporating elements from different cultures can yield diverse and rich visuals.
Improving AI imaging techniques using prompts is an iterative and creative process. By focusing on clarity, context, and creativity, users can effectively guide AI systems to generate images that meet or exceed their expectations. Experimentation and adaptability in approaches are key to making the most of these technologies.
In this article, we will outline key strategies for effectively utilizing Stable Diffusion prompts to create visually striking and authentic photographs. We will explore critical aspects, including the development of detailed prompts that emphasize specific attributes, the influence of adjusting model parameters such as aspect ratio, and methods for refining the output to achieve optimal results. By following these guidelines, you will be better equipped to navigate the intricacies of AI-generated imagery with precision and artistry.
1. Stable Diffusion Prompts: The Right Lighting
Why it is important for creating realistic photos with stable diffusion: Lighting is a crucial aspect of realistic photography because it affects the mood, composition, and clarity of the image. Proper lighting can highlight the subject, create depth and shadows, and evoke certain emotions. Different lighting techniques can be used to achieve different effects. For example, a soft and diffused light can create a peaceful and serene mood, while harsh and direct light can create dramatic and dynamic effects. Without proper lighting, the image can appear flat, lacking in detail, or even blurry. Therefore, understanding lighting and how to manipulate it is essential for achieving high-quality, realistic images.
How you can use stable diffusion prompts to achieve the right lighting:
You can use stable diffusion prompts to create natural and even lighting for your image. It can help to define the light source, include commands to soften shadows and reduce the contrast of the subject. It is also important to define the right angle and distance in the stable diffusion prompt, so the subject is evenly lit without any hotspots or shadows.
Lighting examples to add to your stable diffusion prompt for realistic images:
- Bounce light and soften shadows.
- Diffuse light and create a soft, even glow.
- Spread light and create a natural, diffused look.
- Create sharp, defined light with a soft glow.
- Create long, narrow light sources for dramatic lighting effects.
- Add color to the light and create a specific mood or atmosphere.
- Highlight specific areas of the image or create a focal point.
- Eliminate shadows and create a bright, even light source.
- Focus light and create sharp, defined edges.
- Create a narrow, focused beam of light for more precise lighting control.
Let's try this example with ImageFlash:
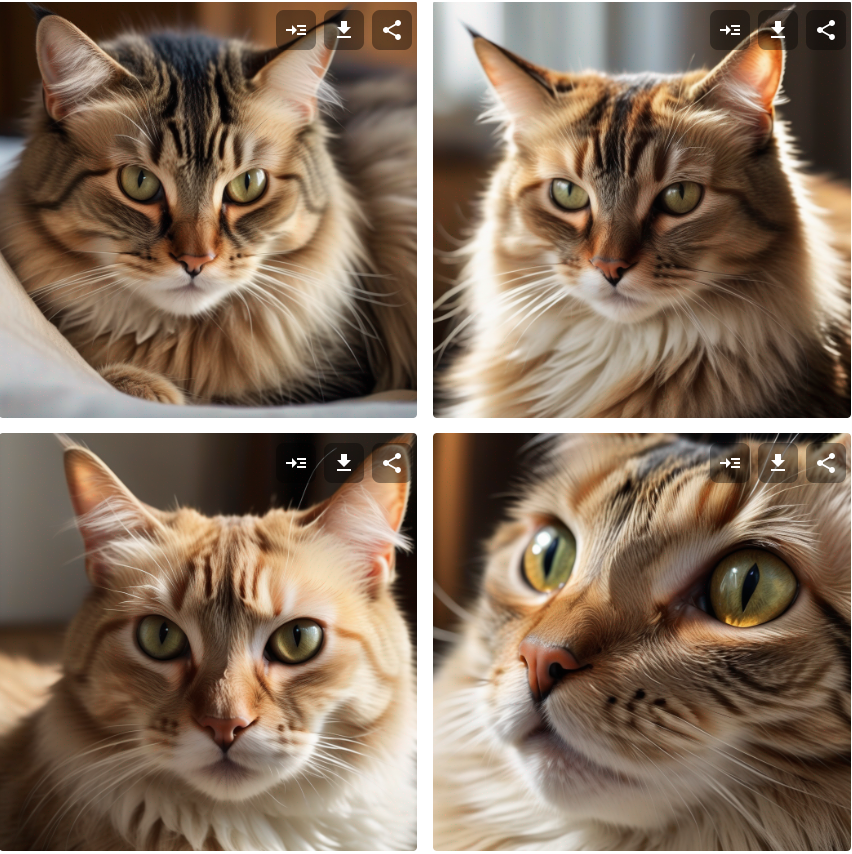
Prompt optimized by ImageFlash:
Realistic photo, close-up: A cat with sharply defined edges, focused light.
2. Stable Diffusion Prompts: Lens Options
Why it is important for creating realistic photos with stable diffusion: Choosing the right lens option is a crucial aspect of realistic photography because it can dramatically affect the outcome of the image. A lens can influence the perspective, depth of field, distortion, and overall composition of an image.
How you can use stable diffusion prompts to make use of different lens options: Choosing the right lens option is crucial for capturing the details and texture of your subject. For example, wide-angle lenses can capture more of the scene, making images appear larger and more immersive. However, they can also cause distortion and exaggerate the distance between objects in the foreground and background. On the other hand, telephoto lenses can compress the distance between foreground and background, creating a more shallow depth of field and a more intimate perspective. They also tend to produce less distortion than wide-angle lenses. A macro lens or a prime lens can offer sharper focus, more accurate colors, and greater depth of field. It is also important to set the aperture correctly to achieve the desired level of sharpness and blur. A shallow depth of field can create a bokeh effect, blurring the background and emphasizing the subject.
Lens examples to add to your stable diffusion prompt for realistic images:
- Wide-angle lens: captures expansive views and creates a sense of space and depth.
- Telephoto lens: compresses distance and provides a closer and more intimate perspective.
- Macro lens: captures details in small subjects and allows for close-up photography.
- Standard lens: produces an image that is similar to what the human eye sees, creating a natural and realistic look.
- Tilt-shift lens: allows for perspective control and can correct distortion in architectural or product photography.
- Fish-eye lens: creates a unique and distorted perspective and can provide an immersive effect for certain subjects.
- Zoom lens: provides versatility in focal length, allowing the photographer to capture a broad or narrow scene.
- Prime lens: produces images with high sharpness and clarity and is ideal for portrait photography.
- Lens filters: can add creative effects to the image or protect the lens from damage.
- Lens adapters: can expand a camera’s lens compatibility and offer flexibility in lens selection.
ImageFlash version with lens options:
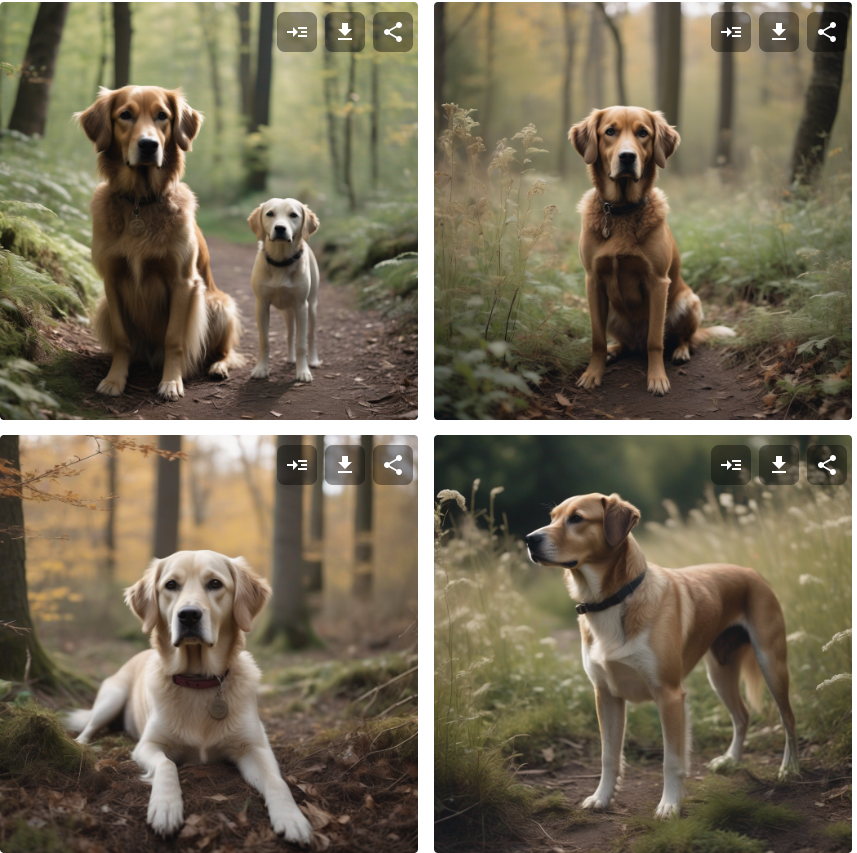
Prompt optimized by ImageFlash:
Realistic photo, standard lens: A dog in a natural setting. Styled like a classic documentary photograph.
3. Stable Diffusion Prompts: Choosing a Background
Why it is important for creating realistic photos with stable diffusion: A good background is important for realistic photography because it can enhance the subject, create a sense of depth and space, and provide context for the image. A background that complements or contrasts well with the subject can draw the viewer’s eye and create interest in the image. On the other hand, a distracting background can take away from the subject and compromise the overall impact of the photograph. Moreover, a good background can help create a specific mood or atmosphere for the image. For example, a background with warm, earthy tones can create a cozy and inviting atmosphere, while a background with cold, muted tones can create a somber and pensive mood. Finally, a good background can make an image appear more realistic by providing context and scale. For instance, a landscape background can provide context for a portrait, giving a sense of where the subject is and what they are doing. Similarly, a background with recognizable objects or landmarks can provide clues about the location and culture of the image.
How you can use stable diffusion prompts to create a good background: Utilizing stable diffusion prompts can help to create a seamless and complementary background for your photos. A plain white or black background can enhance the subject and make it stand out. A stable diffusion prompt can also minimize any reflections or unwanted highlights on the background. Additionally, you can freely change the setting of the background to whatever location you like. It is important to experiment with different angles and positions in the stable diffusion prompt to find the right perspective.
Background examples to add to your stable diffusion prompt for realistic images:
- Neutral-colored backdrops: can create a seamless and uniform look, allowing for greater focus on the subject.
- Textured surfaces: such as brick walls, wooden boards, or cement floors can add depth and interest to the background.
- Natural landscapes: such as forests, mountains, or beaches can add context and scale to the image.
- Urban settings: such as city streets, alleys, or buildings, can provide an edgy and modern look to the background.
- Solid-colored walls: can provide a bright and contrasting background for the subject.
- Patterned backgrounds: such as wallpaper or fabric, can add interest and personality to the image.
- Studio or artificial backgrounds: such as green screens or digital backdrops, can provide a customizable and flexible background option.
- Blurred backgrounds: can create a bokeh effect and provide a sense of depth while keeping the focus on the subject.
- Abstract or artistic backgrounds: such as painted canvases or graphic designs, can add creativity and originality to the image.
- Architectural backgrounds: such as historic buildings or modern structures, can provide a unique and visually striking background.
An example with ImageFlash:
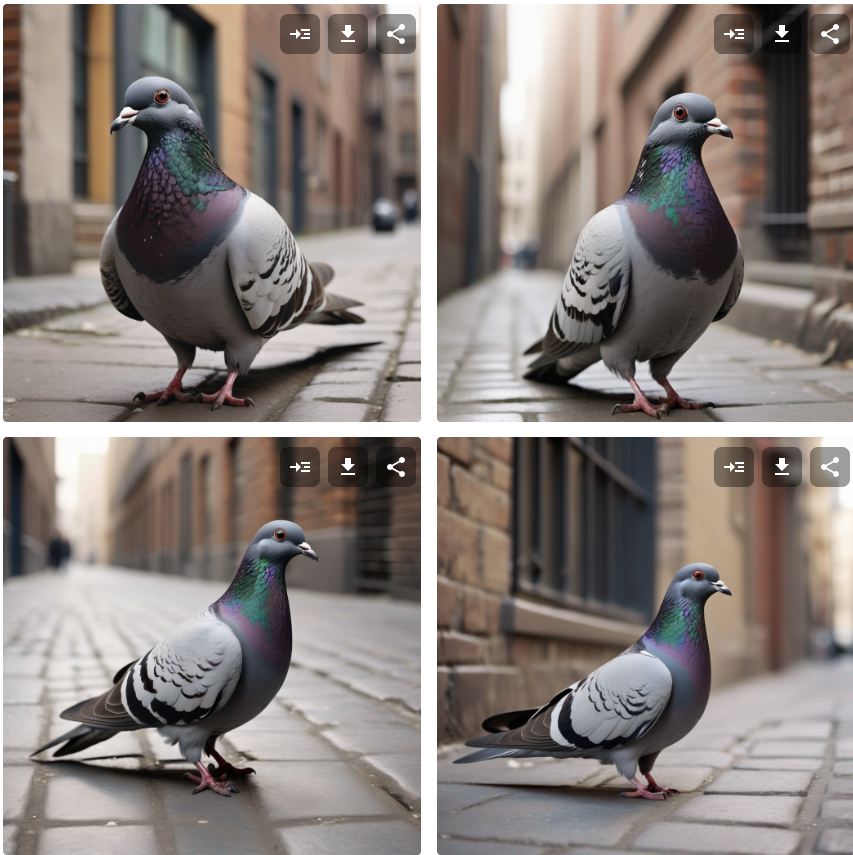
Prompt optimized by ImageFlash:
Realistic photo, close-up: A pigeon in an urban alley. Styled like modern street photography.
Stable Diffusion Prompts: Adding Props
Why it is important for creating realistic photos with stable diffusion:
Good props are important for realistic photography because they can add context, personality, and interest to the image. Props can help tell a story or convey a message, and they can add a sense of depth and detail to the overall scene. They can enhance the subject, complement the background, and provide a sense of scale and space. They can also add color, texture, and contrast, making the image more visually appealing and interesting. Furthermore, props can evoke emotions and create a specific mood or atmosphere.
How you can use stable diffusion prompts to create a good background:
Adding props to your photos can enhance the realism of your subject and make it stand out. For example, if you want to generate photos of a person, you could include relevant items such as a favorite book, piece of jewelry or clothing, or a musical instrument. Props can also be used to convey a specific message or mood, such as a bouquet of flowers for a romantic setting or a suitcase for a travel theme. Just add whatever prop you might see git to your stable diffusion prompt and don’t forget to define the position of the prop in the image and how your subject might interact with it.
Another factor to consider for creating realistic photos is color harmony. Using a digital tool like a color wheel can help achieve balanced and complementary colors that enhance the visual appeal of your images.
Prop examples to add to your stable diffusion prompt for realistic images:
- Furniture: such as chairs, tables, and couches, can add a sense of purpose and comfort to the image.
- Plants and flowers: can add color and life to the scene and promote a sense of freshness and beauty.
- Food and beverages: can create a sense of enjoyment and indulgence and add interest to the image.
- Books and magazines: can evoke a sense of intellect and knowledge and add interest to the scene.
- Clothing and accessories: can enhance the subject and add personality and style to the image.
- Electronics and gadgets: can add a modern and technological feel to the image and promote a sense of productivity or leisure.
- Art and decor pieces: such as paintings, sculptures, and vases, can add a stylish and cultured feel to the scene.
- Sports and fitness equipment: can promote a sense of wellness and activity and add interest to the image.
- Toys and games: can create a sense of playfulness and nostalgia and add a unique twist to the image.
- Personal items: such as jewelry, cell phones, and keys, can add a personal touch to the scene and make the image more relatable.
An example with ImageFlash:
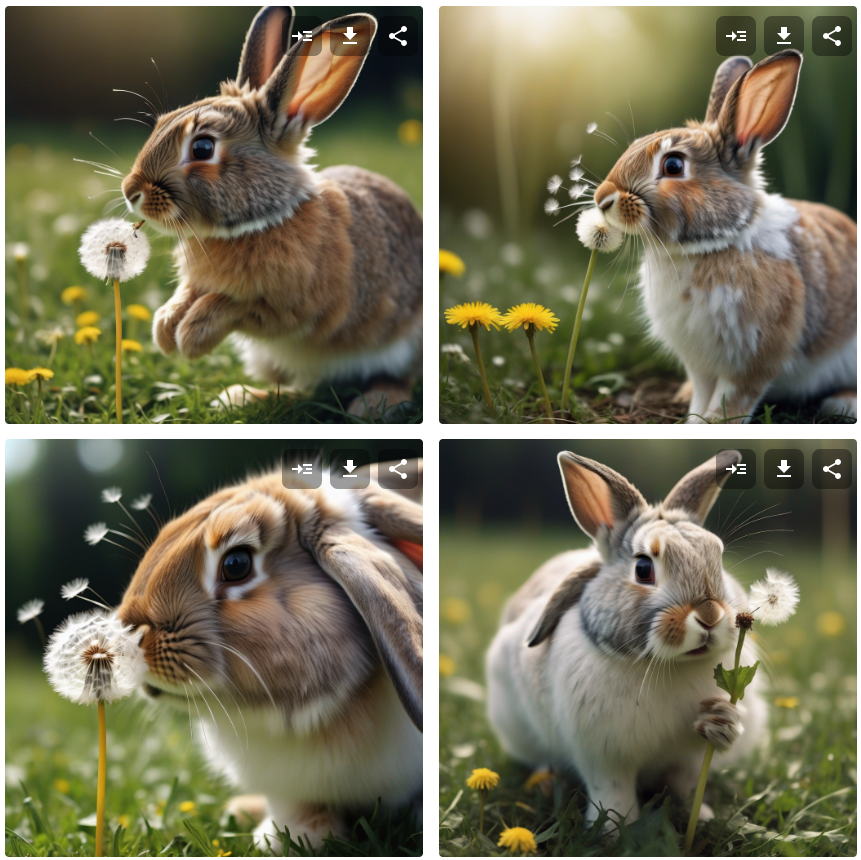
Prompt optimized by ImageFlash:
Realistic photo, close-up: A rabbit holds a dandelion, about to eat it. Styled like a nature documentary.
Stable Diffusion Prompts: Editing Details
Why it is important for creating realistic photos with stable diffusion: Editing details is important for realistic photography because it allows to refine and enhance the image, achieving a polished and professional look while still maintaining a sense of realism. Editing details can address issues such as color balance, contrast, exposure, and sharpness, resulting in an image that accurately reflects the scene and the photographer’s vision. Moreover, editing details can help make the image more engaging and visually appealing. By adjusting the color and contrast, highlighting certain details, or adding texture and depth, the image can look more impactful, interesting, and memorable.
How you can use stable diffusion prompts to create a good background: Tips for post-processing that enhance the results of stable diffusion prompts include adjusting the exposure, contrast, and saturation levels, sharpening the details, and removing any noise or artifacts. A stable diffusion prompt can also be used to add a subtle glow or haze effect to the photo to create a more romantic or dreamy look.
Editing commands to add to your stable diffusion prompt for realistic images:
- Adjust color balance: can balance out color hues to give a more natural and true-to-life look.
- Correct exposure: can adjust the brightness and contrast settings to ensure that the image is properly exposed.
- Increase or decrease saturation: can enhance or tone down the colors in the image for a desired effect.
- Sharpen the image: can make the details in the image crisp and refined.
- Remove noise: can reduce any unwanted grain or distortion in the image.
- Crop the image: can remove unnecessary elements or change the composition for a better focus on the subject.
- Adjust white balance: can correct any color casts that may have been introduced during shooting.
- Dodge and burn: can selectively brighten or darken certain areas of the image to enhance details and add depth.
- Apply filters: can add unique effects and styles to the image to make it more impactful and memorable.
- Clone or heal tool: can remove any unwanted elements or blemishes from the image to create a cleaner and more polished look.
Optimizing prompts with ImageFlash:

Prompt optimized by ImageFlash:
Realistic photo, close-up: A horse in black and white filter. Styled like Ansel Adams’ photography.
Use the Power of Stable Diffusion to Create Realistic Photos with neuroflash
The ability to generate images from text highlights the potential of artificial intelligence as a resource. This is great progress achieved thanks to modern technology. That’s why neuroflash, the number one AI content suite in Europe, includes a high quality AI image generator among its many features. This way you can generate up to four images at the same time, also including a prompt generator for optimized input and even better results.

Useful Tips for Creating Realistic Photos with Stable Diffusion Prompts
- Pay attention to lighting: Understanding lighting and how to manipulate it is essential for achieving high-quality photographs. Experiment with different lighting techniques to achieve different effects.
- Choose the right lens option: Lens selection can dramatically affect the perspective, depth of field, distortion, and overall composition of your images. Understanding the different types of lenses available can help you choose the right one for the effect you want.
- Pick the right props and background: Props and backgrounds can add context, personality, and interest to the image. Choosing the right ones can greatly enhance the overall impact and mood of the image.
- Focus on details: Details matter, especially in realistic photography. Pay attention to small details, such as sharpness, color balance, and noise reduction, in both your shooting and editing processes.
- Think about composition: Composing a shot involves carefully placing your subject and arranging the elements in the background for the most impact. Keep in mind the rule of thirds, leading lines, and symmetrical or asymmetrical balance.
- Edit your photos carefully: Editing can refine and enhance your images, but overdoing it can make them appear fake and unrealistic. Pay attention to color, contrast, sharpness, and other details, but keep in mind the overall goal of a realistic look.
- Combine different elements in your stable diffusion prompt: Take all of the aspects above and combine them in your prompts. Experiment with different combinations and explore the prompts that seem to work well for high-quality results.
Related Questions
What kind of light is best for stable diffusion in photography?
The best kind of light for stable diffusion in photography generation is soft, natural light or diffused artificial light.
Can you achieve realistic photos without stable diffusion prompts?
It is possible to achieve realistic photos without a proper stable diffusion prompts, but it is rather random. Generating precise results requires careful adjustment of the lighting, lens, and other aspects. A detailed stable diffusion prompt can make the process easier and more consistent.
How can we use image processing techniques to enhance the diffusion stability of photos?
Image processing techniques such as noise reduction, sharpening, and selective editing can help to enhance the diffusion stability of photos. Machine learning algorithms can also be trained to predict the stability of photos based on their content and other parameters.
What are the key factors that affect the stability of diffuse photos, and how can we optimize each factor for better results?
The key factors that affect the stability of diffuse photos include lighting, lens choice, camera settings, and post-processing techniques. To optimize each factor for better results, it is important to experiment with different combinations and find the right balance for each specific subject and setting.
Can machine learning algorithms be trained to predict the stability of photos based on their content and other parameters?
Yes, machine learning algorithms can be trained to predict the stability of photos based on their content and other parameters. This can help to automate the process of stable diffusion prompts and make the results more consistent.
How can we evaluate the performance of different diffusion stability methods, and what metrics should we use to compare them?
We can evaluate the performance of different diffusion stability methods by comparing the sharpness, contrast, color accuracy, noise level, and overall aesthetic appeal of the photos. Other metrics such as the time required for setup, the cost of the equipment, and the ease of use can also be taken into consideration.
Are there any practical applications for stable diffusion techniques, and how can we integrate them into existing photography workflows?
Practical applications for stable diffusion techniques include portrait photography, product photography, still life photography, and many other genres. We can integrate them into existing photography workflows by experimenting with different setups, using software tools for post-processing, and sharing experiences and knowledge with other photographers.